
Congrats on purchasing your new air return vent from Envisivent. The instructions provided are meant for the capable DIY or handyman. If you are not comfortable with taping, mudding and sanding, we would recommend you speak with a contractor for further assistance. These instructions apply to the Envisivent Removable Air Return Vents.
Let’s get installing!
-
It’s important to ensure that you choose the right product for your project by looking at the drywall size and the boot duct size as well as the function of the vent. Contractors and HVAC specialists will look at the PRODUCT SPECIFICATIONS that are shown on each product page to ensure they are installing the correct size. The vent sizes shown within the title of these products are the “BOOT DUCT SIZE” sizes. This is important to remember when selecting the correct size for a project. I.e: ENVISIVENT Removable Air Return Vent, 14” x 8” - the 14” x 8” dimensions refers to the boot duct size.

PRO TIP: The “Boot” is a fitting that allows the duct piping to connect to the round pipe and is framed into the wall, floor or ceiling. The rectangular part is faced towards the direction of the room. The size of ductwork affects the amount of airflow and its velocity and is very important in how well the HVAC system operates.
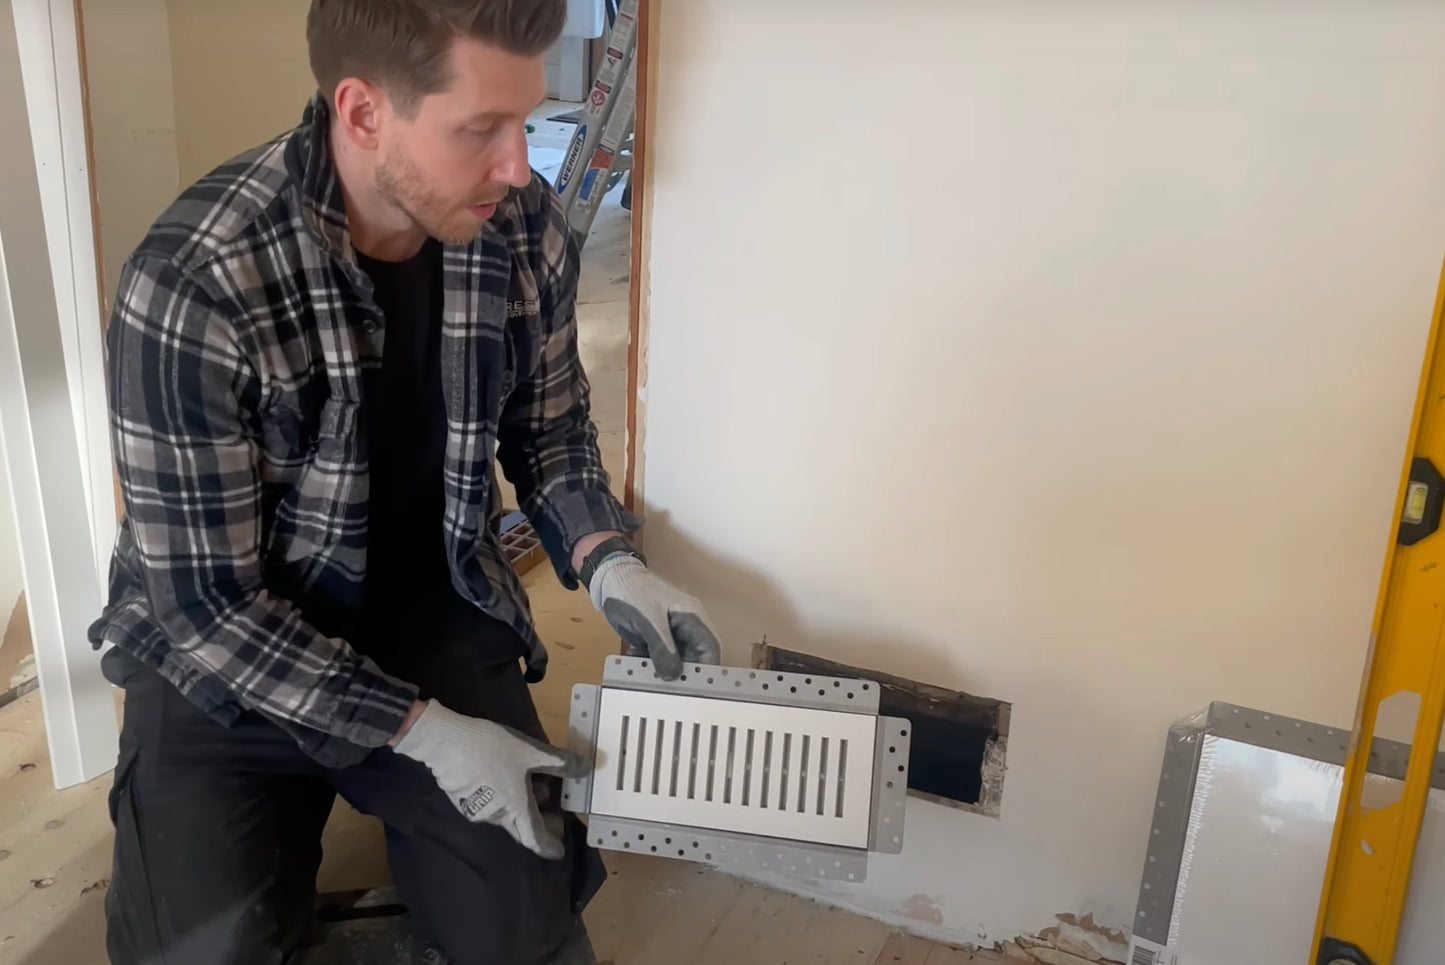
- Remove the current/old vent to view the drywall opening.
- Remove the Envisivent product from its packaging and slide the product into the opening to ensure the correct fit prior to screwing into the drywall. The Envisivent product will come in 2 parts: the magnetic air return vent cover and the metal frame. The magnetic air vent cover will be placed inside the metal frame as it would be shown on the wall and pops out of the metal frame for easy access.
- Ensure the metal frame is sitting flat and flush to the drywall and that the vent is sitting level. Once confirmed the vent is level, remove the air return vent cover, leaving the metal frame in place.
PRO TIP: When installing, remove the magnetic Air Return Vent to eliminate the vent slots getting exposed and filled with Joint Compound prior to using.
- Once you have removed the air return vent cover and have ensured the vent is level, secure properly with screws into the blocking (the holes within the metal frame).
PRO TIP: With the Air Return Vent Cover inside the metal frame, use a 1-1/4” Fine Thread drywall screw to fasten the metal frame onto the existing drywall and studs, space every 6” to 8” to ensure the frame does not twist or warp during install. - Mud the metal frame into the wall, making sure to feather/blend off the edges to the existing drywall (minimum of 10” feathering is recommended to blend seamlessly). Dura90 is recommended for the first coat – following coats use a Ready-Mix Drywall Compound for easier sanding.
- Once Joint Compound is dry as per manufacturer specifications, you can begin the process to blend the Air Return Vent with the drywall (Note: a second skim coat of Joint Compound such as a ReadyMix Drywall Compound is recommended once the initial installation step has been completed).
- If required, a touch up third coat with Ready-Mix Drywall Compound may be required to achieve your seamless finish.
- Once finished and dried, paint your desired colour over the wall and the vent for the perfect, seamless look.
CHECK OUT OUR EASY TO INSTALL VIDEO WITH REFRESH HOME IMPROVEMENTS